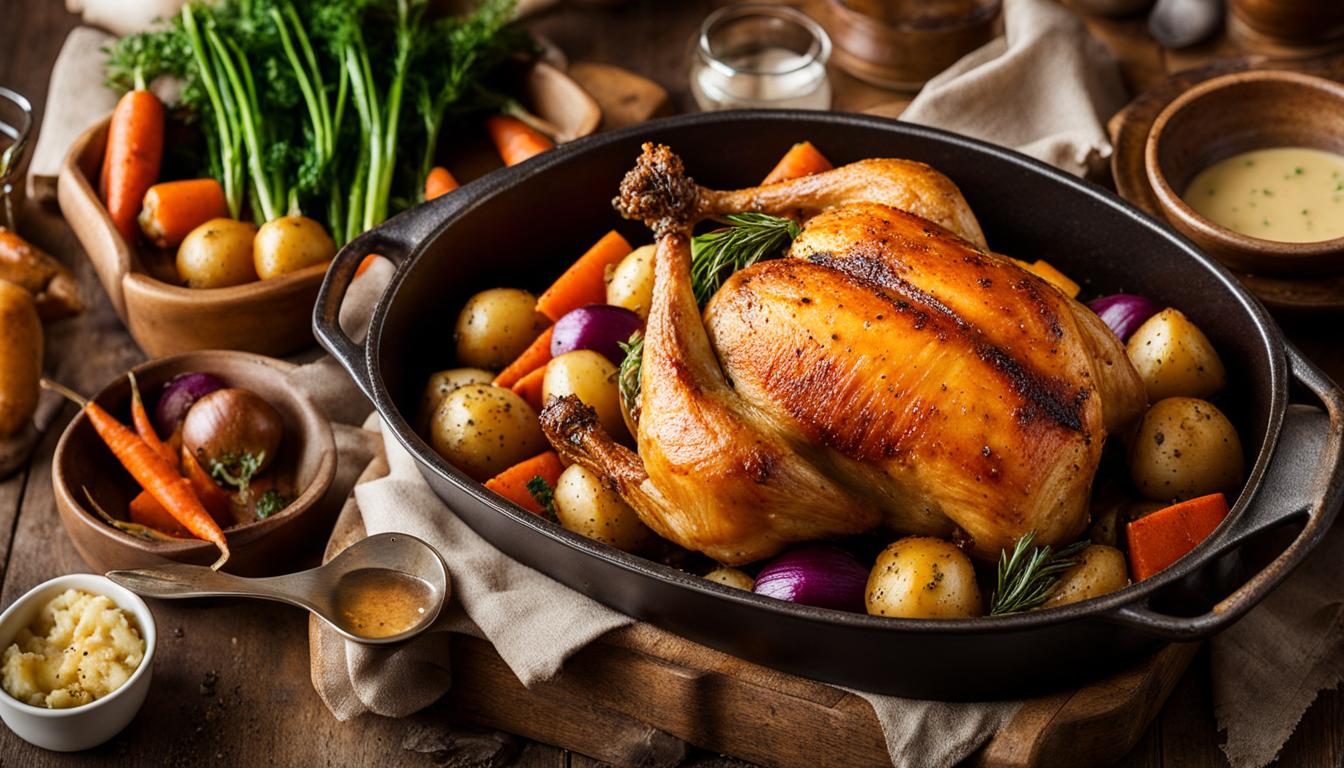
Greetings, food enthusiasts! Today, I’m excited to share my tried-and-tested roast chicken recipe that will have your taste buds dancing with delight. Who doesn’t love a succulent and mouth-watering chicken dish that is both easy to make and flavorful? This recipe will become a staple in your kitchen – perfect for your weeknight dinner or Sunday roast.
Trust me; once you try this recipe, you won’t look back. So let’s get started and elevate your cooking skills to a whole new level. Are you ready to create the perfect roast chicken? Let’s do this!
Ingredients for a Mouthwatering Roast Chicken
Before we start cooking, let’s gather all the necessary ingredients to make our roast chicken recipe exceptional.
Here are the ingredients you’ll need:
| Ingredient | Quantity |
|---|---|
| Whole Chicken | 1 (about 4-5 lbs) |
| Olive oil | 2 tbsp |
| Butter | 2 tbsp |
| Fresh Thyme | 2-3 sprigs |
| Fresh Rosemary | 2-3 sprigs |
| Fresh Sage | 2-3 leaves |
| Lemon | 1 |
| Garlic | 4-5 cloves |
| Salt and Black Pepper | To taste |
For a crispy exterior, I recommend patting the chicken dry with paper towels before seasoning it with olive oil and a generous sprinkle of salt and black pepper. Additionally, I highly recommend using fresh herbs for a burst of flavour that will take your roast chicken to the next level.
Note: You can also add other herbs or spices that you love, such as garlic powder, paprika, or cumin, to create your specific herb rub.
By using the above ingredients, you’ll have all the essentials to create a delicious oven-roasted chicken that will be the highlight of your dinner table.
Preparing the Chicken for Roasting
Preparing the chicken is a crucial step in creating a delicious roast chicken. Follow these simple steps to ensure your chicken is ready for the oven:
- Remove the chicken from its packaging and pat it dry with paper towels. This will remove any excess moisture, ensuring the skin crisps up during roasting.
- Trim off any excess fat and remove the giblets from the cavity. These can be discarded or used to make stock for another recipe.
- Season the chicken generously with salt and pepper, both inside and out. This will enhance the flavor of the chicken and create a tasty crust on the skin.
- For a simple roast chicken, you can stop here and move on to the roasting process. However, if you want to add extra flavor, try rubbing your chicken with herbs and spices. Check out Section 5 for my favorite herb rub recipe.
Once your chicken is properly prepared, it’s time to move on to roasting. But first, let’s take a look at the methods for achieving that tender and flavorful result that we all crave.
The Secret to a Juicy Roast Chicken
If you’re looking for a roast chicken recipe that is succulent and moist, you’re in the right place. My secret to achieving the perfect juicy roast chicken lies in one crucial step: trussing. Trussing is the process of tying the chicken’s legs together, pushing its wings under the body, and creating a compact shape that cooks evenly and retains moisture.
Trussing prevents the chicken’s juices from escaping, ensuring that each bite is packed with natural and delicious flavors. It creates a seal around the chicken, effectively steaming it from the inside while still achieving a crispy and golden-brown exterior.
There are several ways to truss a chicken, but my favorite is the classic method. Placing the chicken breast-side up, use kitchen twine to tie the legs together, tucking them under the tail. Next, tie the twine around the wings and body, securing them tightly. Voila, a perfectly trussed chicken, ready to be roasted to perfection.
Once you’ve trussed your chicken, it’s time to season it with your favorite herbs and spices. And remember, the key to a juicy roast chicken is to let it rest for at least 10-15 minutes after cooking, allowing the juices to settle and redistribute throughout the meat.
Pro Tip: If you’re short on time, butterfly the chicken and follow the same trussing process for an evenly cooked and juicy roast chicken.
Comparison Table
| Trussing | No Trussing | |
|---|---|---|
| Juiciness | Retains moisture resulting in a juicy roast chicken | Dries out quickly, resulting in a dry roast chicken |
| Crispiness | The skin becomes crispy and golden-brown when properly trussed | The skin often becomes soggy and lacks crispiness |
| Cooking Time | Cooks evenly and reduces cooking time | Cooking time is longer and often uneven |
Creating a Flavorful Herb Rub
The herb rub is what takes a good roast chicken recipe to an unforgettable one. The right blend of herbs and spices will infuse your chicken with a delicious aroma and fantastic taste.
For my herb rub, I like to mix together minced garlic, smoked paprika, thyme, rosemary, and salt and pepper. The smoked paprika adds a depth of flavor that complements the herbs, while the garlic elevates it to another level.
When it comes to applying the herb rub, make sure to massage it thoroughly into the skin, ensuring that every inch of the chicken is covered. Don’t forget to get under the skin as well, where the meat is most delicate.
TIP: If you have an extra 30 minutes, let the chicken sit with the herb rub for extra flavor infusion.
Once you’ve applied the herb rub, you can let the chicken sit at room temperature for a while or put it straight into the oven. The rest of the cooking process will take care of itself, giving you juicy and flavorful roasted chicken with herbs.

Herb Rub Recipe
| Ingredient | Quantity |
|---|---|
| Garlic | 3 cloves, minced |
| Smoked paprika | 2 teaspoons |
| Thyme | 1 teaspoon |
| Rosemary | 1 teaspoon, finely chopped |
| Salt | 1 teaspoon |
| Pepper | 1/2 teaspoon |
With this herb rub, your roasted chicken will be a crowd-pleaser that will keep your guests coming back for more. Enjoy!
The Art of Roasting
If you want to achieve a crispy and golden-brown exterior while maintaining juicy meat, mastering the art of roasting is crucial. Here are the steps you need to follow to achieve that perfect roast chicken:
Temperature
Preheat your oven to 200°C for an oven-roasted chicken. Maintaining a consistent temperature is key, so avoid opening the oven door frequently during cooking.
Cooking Time
The cooking time for your roast chicken will depend on its weight. As a general rule of thumb, roast for 20 minutes per 500 grams, plus an extra 20 minutes. Use a meat thermometer to check that the thickest part of the chicken reaches an internal temperature of 75°C.
Techniques for Crispy Skin
There are several techniques to achieve that crispy skin we all crave. One of my favourites is to start roasting the chicken at a high temperature, then reducing the temperature after 20 minutes. Another option is to baste the chicken with melted butter or olive oil every 20 minutes during cooking. And finally, you can broil the chicken for the last few minutes to get that extra crispiness.
Whatever technique you choose, remember to let your oven-roasted chicken rest for at least 10 minutes before carving to ensure that the juices are evenly distributed and the skin remains crispy.
Tips for Achieving a Crispy and Juicy Roast Chicken
| Tip | Description |
|---|---|
| Pat the Chicken Dry | Before seasoning, pat the chicken dry with paper towels. This helps to remove any excess moisture that can prevent the skin from crisping up. |
| Season Liberally | Don’t be shy with your seasoning – be sure to season the chicken inside and out, and under the skin for extra flavour. |
| Use Aromatic Ingredients | Add herbs, garlic, or lemon to the cavity of the chicken for extra aroma and flavour. |
| Truss the Chicken | Trussing the chicken with kitchen twine helps it cook more evenly and maintains its shape while roasting, resulting in a juicier bird. |
| Let it Rest | After roasting, allow the chicken to rest for at least 10 minutes before carving. This allows the juices to redistribute, resulting in a more tender and juicy chicken. |
Basting for Extra Flavor
Once your roast chicken has been cooking for a while, it’s time to baste it to ensure maximum flavor. Basting involves spooning the juices from the bottom of the roasting tin over the chicken to keep it moist and add extra richness to the flavor. Here are my top tips for basting your chicken:
- Wait until the chicken has been cooking for at least 30 minutes before basting. This will give the skin time to crisp up and prevent it from becoming too soggy.
- Spread melted butter or oil evenly over the skin of the chicken before basting to help it brown evenly and add extra flavor.
- Baste the chicken every 20-30 minutes to keep it moist and flavorful throughout the cooking process.
- If you’re using a flavorful marinade, use it to baste the chicken instead of the juices from the pan for an extra hit of flavor.
- Be careful not to open the oven door too often while basting, as this can cause the temperature to drop and increase the cooking time.
By following these tips, you’ll end up with a deliciously moist and flavorful roast chicken that will be the star of your dinner table.

Letting the Chicken Rest
Once your delicious roast chicken is finished cooking, resist the temptation to carve it straight away. Letting the chicken rest for 10-15 minutes will make all the difference in achieving a tender and succulent meat. During this time, the juices will redistribute throughout the chicken, resulting in a moist and flavorful dish.
Resting also makes carving the chicken easier and neater, as the meat will have time to firm up slightly. Simply transfer the chicken to a cutting board, cover it loosely with foil, and let it rest in a warm spot.
If you’re worried about the chicken losing its warmth, you can always pop it back in the oven for a few minutes before carving. Trust me, the result will be well worth the wait!
“Not only does allowing cooked meat to rest result in a more tender and tasty meal, but it also helps the juices soak back into the meat evenly, resulting in a juicy and flavor-packed dish.” – Jamie Oliver
Carving and Serving Your Roast Chicken
As your roast chicken comes out of the oven, it’s important to let it rest for about 15 minutes to lock in all the juices and flavors. Once it’s rested, you’re ready to carve and serve your delicious creation. Here’s how:
- Using a sharp carving knife, cut alongside the breast bone to remove the breast in one piece. Repeat on the other side and set aside.
- Next, carve the legs and thighs, separating them at the joint.
- Slice the breast meat to your desired thickness, ensuring that each piece has a bit of crispy skin on top.
Now that your chicken recipe is perfectly carved, it’s time to serve it up with your favorite sides. Roasted potatoes and steamed veggies make a great complement to this dish. For a truly British touch, try serving your roast chicken with traditional Yorkshire pudding, or a rich and savory bread sauce.
“This roast chicken recipe is so easy and delicious. Even my picky kids love it!” – Jane S.
Conclusion
To sum up, this juicy roast chicken recipe is a game-changer for any home cook like me. By following my step-by-step instructions and incorporating the right techniques, I have been able to create a roast chicken that is easy to make, bursting with flavour, and sure to impress my family and guests.
With all the right ingredients and steps, this recipe is guaranteed to bring out the tastiest and most succulent roast chicken every time. Plus, it’s perfect for any occasion, whether it’s a family dinner or a gathering with friends.
In conclusion, this is a must-try recipe for anyone who loves delicious food. I can’t wait for you to savor each bite of this fantastic dish!
FAQ
What is the best roast chicken recipe?
The best roast chicken recipe is one that is juicy, flavorful, and easy to make. It should involve the right combination of ingredients and cooking techniques to ensure a delicious outcome.
How do I make roast chicken crispy?
To make roast chicken crispy, it’s important to use the right temperature and cooking time. Additionally, starting with dry chicken skin and using a high heat at the end of cooking can help achieve that coveted crispy texture.
Can I use dried herbs for a roasted chicken?
Yes, you can use dried herbs for a roasted chicken. However, using fresh herbs will provide a more vibrant flavor. If using dried herbs, be sure to crush them between your fingers to release their full aroma.
How long should I let the chicken rest before carving?
It is recommended to let the roasted chicken rest for at least 10-15 minutes before carving. This allows the juices to redistribute, resulting in a more tender and succulent meat.
What are some serving ideas for roast chicken?
Roast chicken pairs well with a variety of side dishes. Some popular options include roasted vegetables, mashed potatoes, crispy Yorkshire puddings, or a fresh salad. Don’t forget to serve it with a delicious gravy made from the pan drippings!